
So let's talk about the basics : What are the essential products you should have in your makeup bag or your kikay kit.
I have listed a few items below that I personally cannot leave my house without. And if ever that I am in a rush or if I have time to do my makeup in the car (as a passenger of course), or if I have time to do it when I get to work, these are the items I take with me to make sure I will look presentable, professional, and just put together. The photos below have different products that I use, of course I do not bring them all with me, I just choose one of each.
So let's get pretty!

Step 1: Primer

"It's a crime not to prime"
So the purpose of using a primer is so that you will have a smooth face/canvass to work with.
This also helps your makeup last longer and stay vibrant after a couple of hours.
My favorite is actually The Porefessional from Benefit Cosmetics (however I just used up my last tube). It is a bit pricey so I often use Maybelline's Baby Skin Pore Eraser. This is only around P299 at Watson's and it works amazing. A tiny pea-sized amount goes a long way with this product and I discovered that it helps control sebum a little bit as well.
For those days that I would like to get an illuminating glow to my makeup, I use a CC Cream from Etude House to achieve that dewy glow effect.
For a matte primer, I use Babyface One Step Base from It's Skin Korea in Lavender pink to help correct the discolorations on my face.
Step 2: Foundation / BB Cream

I believe because of my Chinese heritage, my skin responds a lot well to Korean and Japanese foundations. I have tried a wide variety of foundations, even spending a lot on high end ones, but I find that these ones work for me better.
I use a Beauty Blender to apply my foundation or the BB Cream to achieve that flawless finish. Sometimes I also use a foundation brush to get a more matte and a heavier coverage. So far my favorite is the new Stay-Up Foundation from Etude, it is a perfect match for my skin, it is light, and the coverage is amazing. The Aqua Petit Jelly BB Cream from Holika Holika is also great, however it does tend to fade away after 6 hours max. I also love this BB Cushion from Etude House, it is easy to apply and gives me that dewy effect. The coverage though is a bit light.
Step 3: Concealer
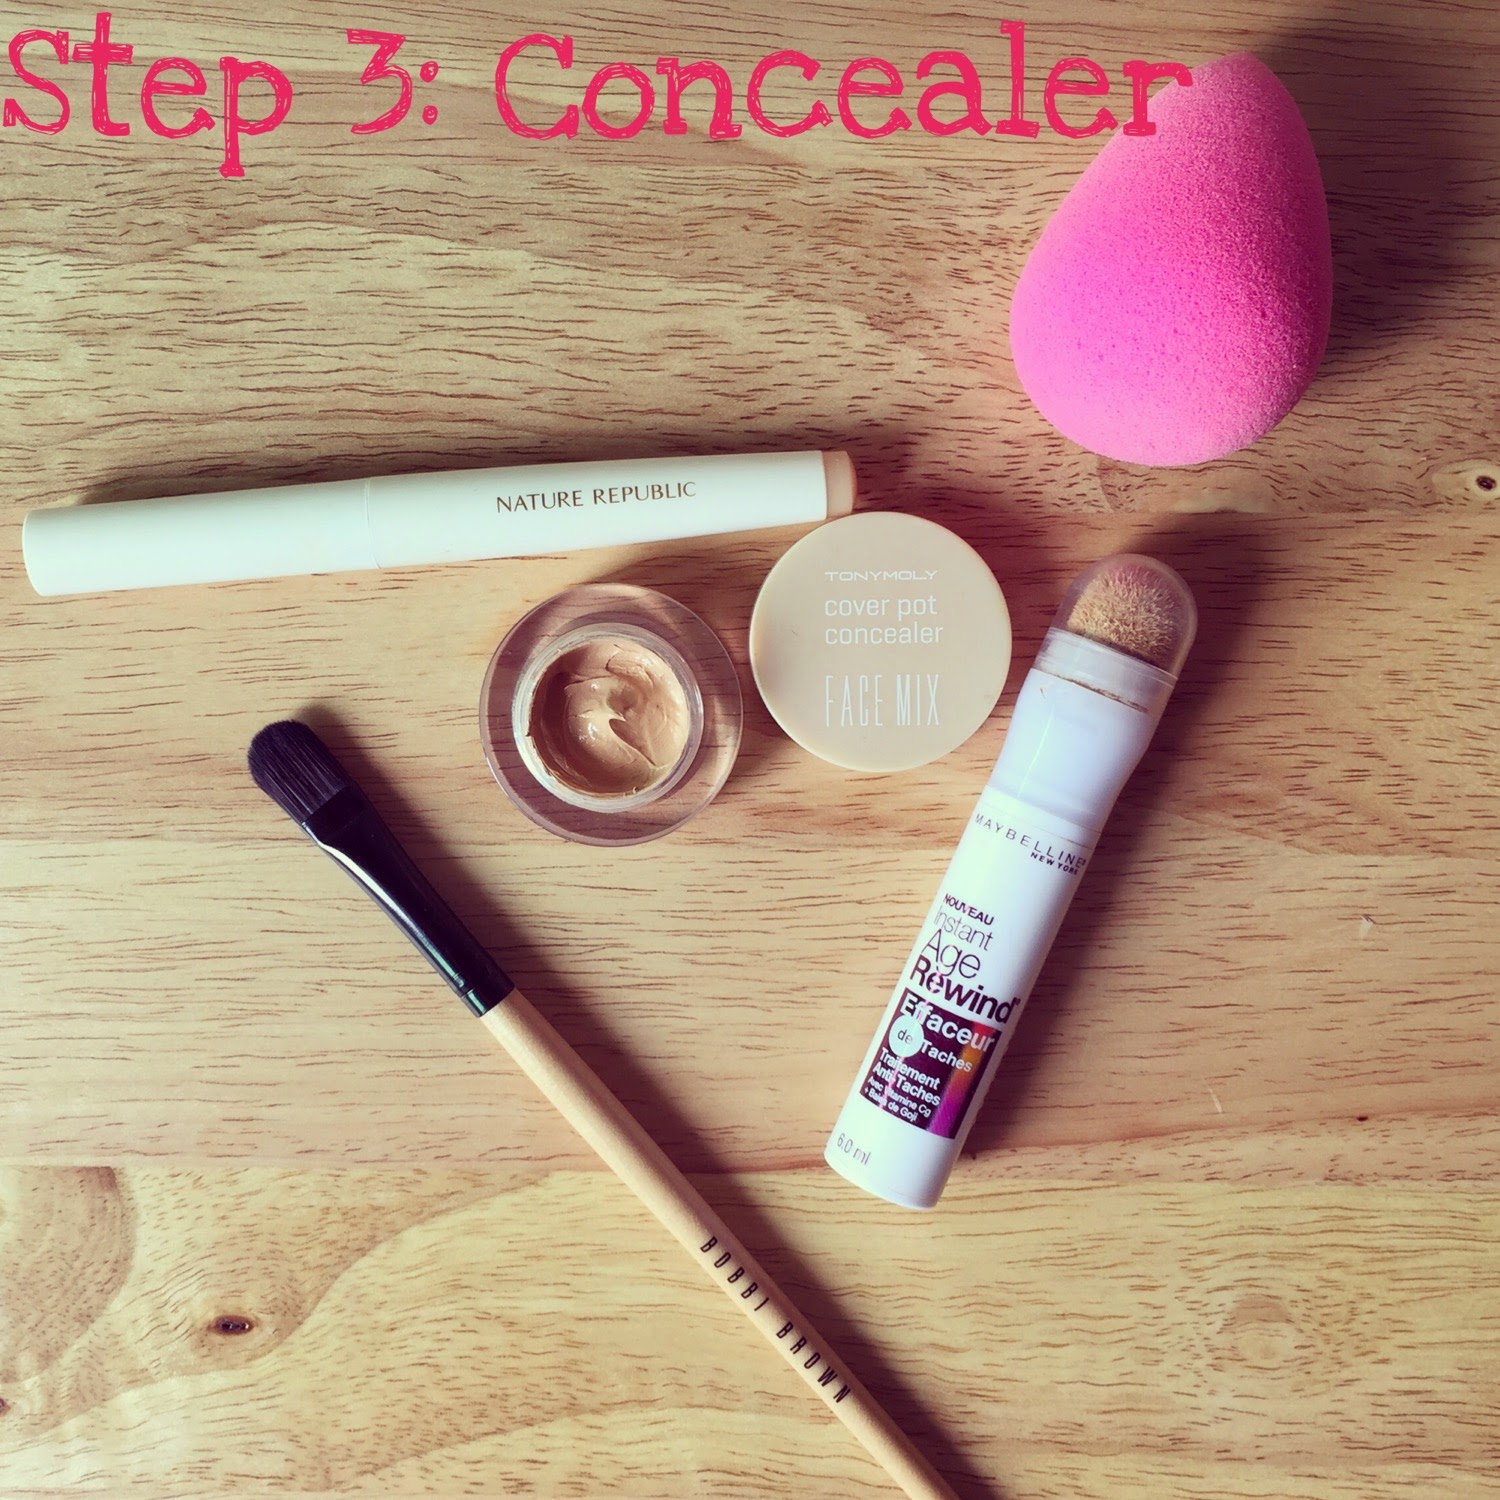
Though having almond shaped eyes, I still get panda eyes (yes dark circles around my eyes) so I use the Maybelline Age Rewind concealer for under my eyes and on the bridge of my nose to help highlight. I use Nature Republic's Botanical Vanilla Stick Concealer for my breakouts and dark spots. It is so inexpensive (P245) and the pigmentation is really great. I also use the Face Pot Concealer from Tony Moly for those days where I know I would need the heavier type of coverage. I blend in my concealer using either a concealer brush or my Beauty Blender.
Step 4: Brows

I am not an expert on brows, and this is actually my weakness.
That is why I use a brow pencil from Etude House or The Face Shop because this is the easiest to use to temporarily repair sparse brows and shape the brows effectively. It comes with a spoolie brush on the other end as well so it is a 2-in-1 product. I also use brow powder sometimes, but not as often as a pencil. You can also substitute a regular eyeshadow that matches your eyebrow shade, or a shade lighter than your natural hair to achieve a younger look.
Instead of using a brow gel, I use this "Color My Brows" from Etude House which works as well as a brow gel, but with color.
Step 5 : Eyeshadow Primer (Optional)

This product helps with your eyelids from creasing, and it makes eyeshadow apply on smoothly on your lids. It also makes your eyeshadow stay on longer and it helps make the colors a little bit more vibrant and pigmented once applied.
I have been loving the Poof 10 Eye Shadow Primer from Etude House a lot better than Urban Decay's Primer Potion which is a lot more expensive. The Cover Girl Eye Shadow Blast is actually an Eye Shadow and Eye Primer in one just like the 2 gold ones I have here from Urban Decay.
Step 6: Eyeshadow

If you are rather new to makeup, your best bet is to start with a nude palette.
I love this Dream Catcher palette from NYX, it is an almost dupe of the Naked Palette from Urban Decay. (My Naked Palette and Too Faced Chocolate Bar palette is still arriving from the US next week and will be writing a review and tutorial on them soon, so stay tuned).
I also like Too Faced Boudoir Eyes and Natural Eyes (Not shown) because they come with these little booklets that serve as a guide for different looks you can do with the palette.
What I really didn't like was this Naked palette by City Color. It is not pigmented at all, and I have to use a lot of product to actually see it on my skin.
Step 7 : Powder / Setting Powder (Optional)

And because we live in this very humid tropical country, I can not go out without setting my makeup with a hefty amount of translucent powder to seal all my hard work in place.
I am really loving L'Oreal's Infallible powder, though it is not translucent, it does last for about 10 hours. The best translucent powders I have tried is the Healthy Wear Powder from Physician's Formula and the popular Ben Nye Banana Powder which is also great for highlighting.
Step 8 : Bronzer (Optional)

I have a big face. Very round, and my cheeks are rather perky most of the time so I can not leave my house without contouring my face. I also find it best when I go for deep contouring to give that illusion that I have a gorgeous bone structure (even though I don't) haha :)
Step 9 : Blush

You should only have 2 colors for your blush collection, and thats about it.
1st is a soft pink, and 2nd is a peach/orange colored blush with a little shimmer, and you are all set.
The pink can go with any makeup or outfit, while the peach one is perfect for a summer glow. I sometimes use the Stay Blushed! by Rimmel as a cream blush base, then set it with a powder blush when I have to be somewhere for a couple of hours. I find that this helps a lot in making my blush last longer.
Step 10 : Eyeliner and/or Mascara

Being a 'chinita' I use my mascara like a beast. I have very sparse and short eyelashes, so I need a lot of mascara to help open up my little eyes, and give me an overall bright effect. I also use my eyeliner to do my winged eye that helps make my eyes appear bigger and a little more elongated at the ends.
Step 11 : Lipstick, Lipbalm, and Lip Gloss

Step 12 : Setting Spray or Setting Powder (Optional)

Once everything is complete, i decide to go on with one more sweep of a setting powder and I finish everything off with a setting spray that will help set my makeup quicker, give me a dewy finish, and helps my makeup stay in place longer.
Thank you for your post. This is excellent information. It is amazing and wonderful to visit your site.
ReplyDeletecosmetic products recall
recall cosmetic products