Monday, May 25, 2015

5 Steps to quick & easy "Lazy Day Makeup"

Quick & Easy "Lazy Day" Makeup Look in Just 5 Steps!


Ladies, let's keep it real!  We all have those days where we actually feel for Bruno Mars when he sings "Today I don't feel like doing anything..." and most often than not, we actually have to be somewhere like go to work or go to a meeting, a lunch, or any event.  So we have no choice but to look presentable.

So for those "lazy days" ahead, you can use this easy steps on how to look presentable but still feel like there's nothing much on your face.


Step 1: Primer / Pore Minimizer or Blurrer

I love Etude House's new product called "Beauty Shot Face Blur" which is a lightweight cream that helps blur skin imperfections like wrinkles and sun spots.  It also minimizes the appearance of pores really well.

I really like the way that it is a cream product, but goes on lightly on your face as if you just put on a very light moisturizer.

It has SPF15 which is great considering we live in a tropical country where it feels like you're cooking when you step outside.

This product can be worn alone or under makeup as a primer.

How to apply:
Just slather a pump and a half of this product all over your face and neck.  Wait for it to dry a bit before putting on concealer or blush.

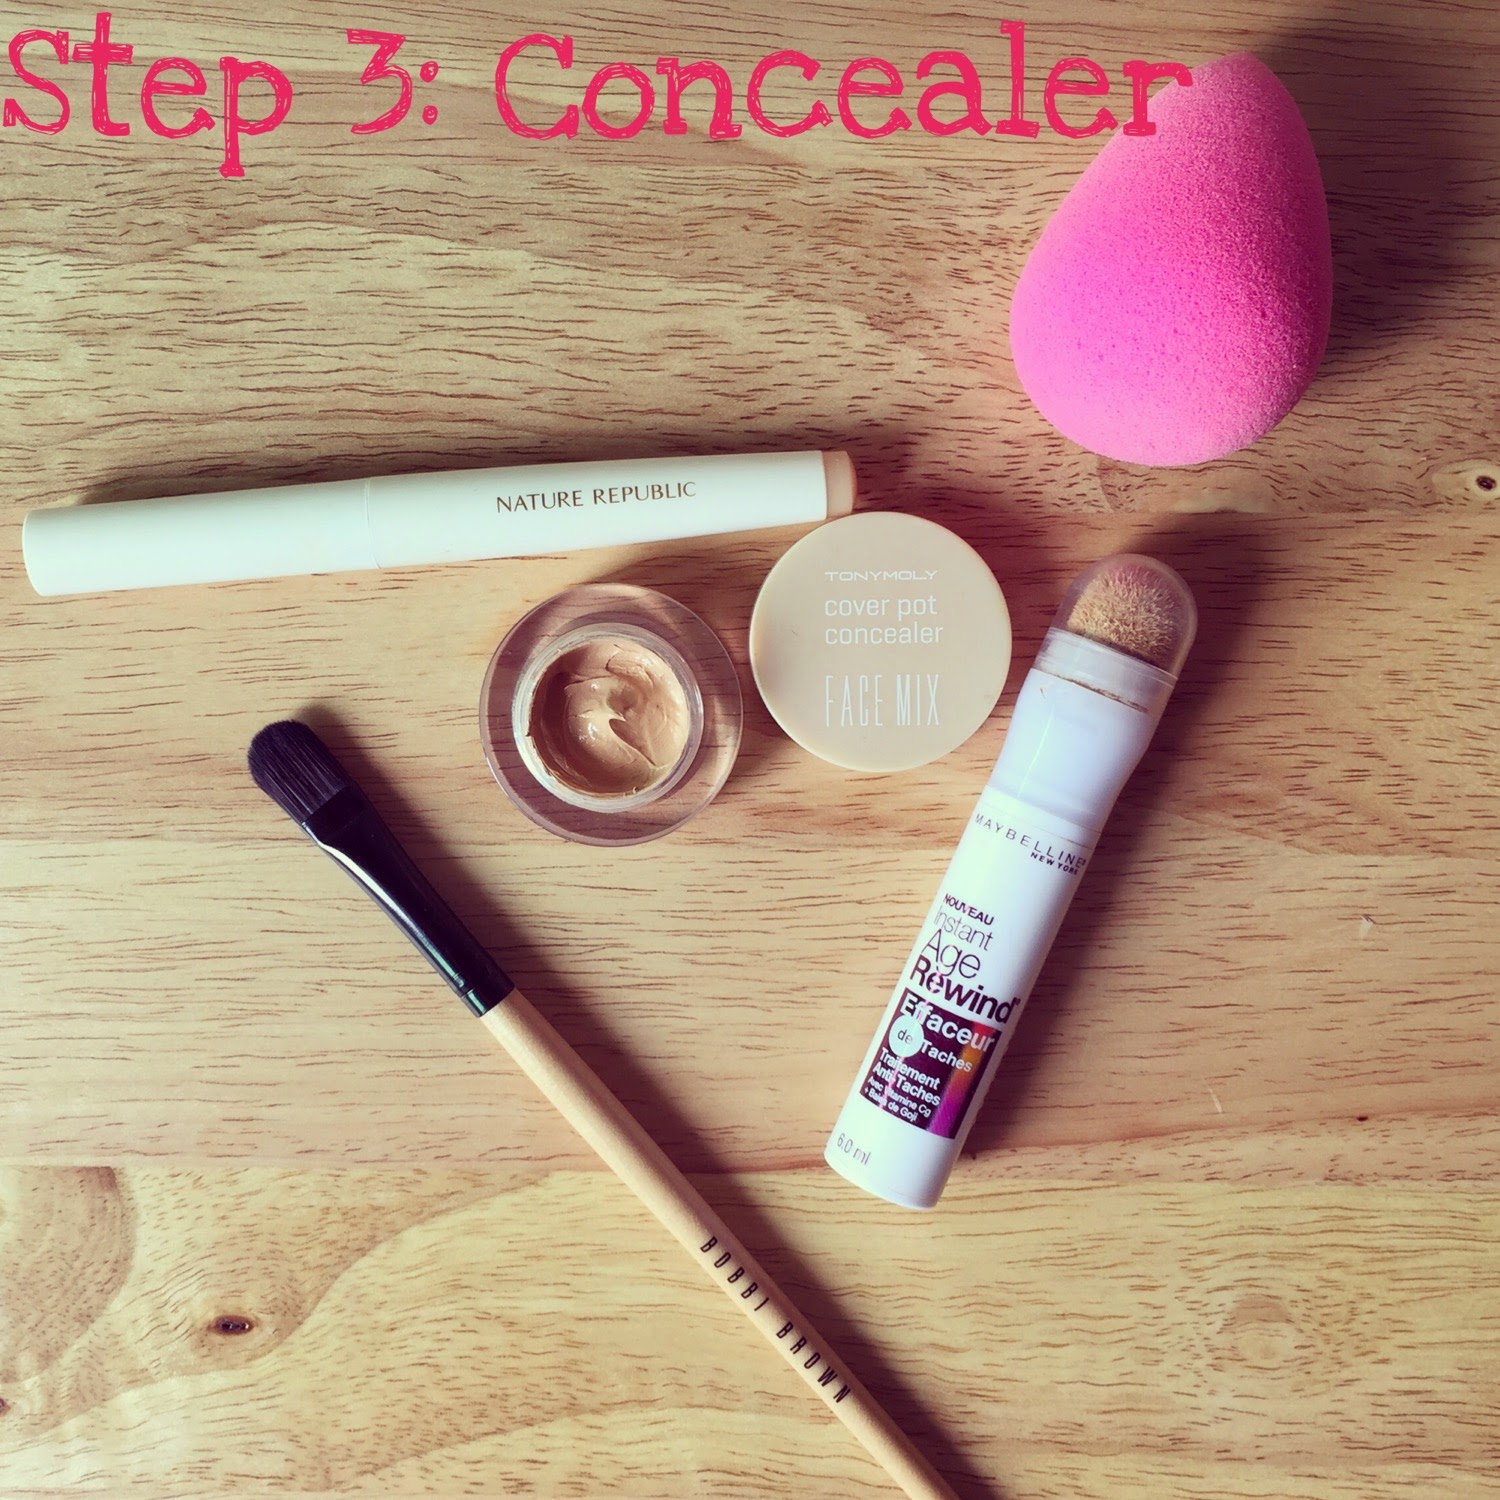
2. A Hydrating Concealer

"The Fake Up" by Benefit Cosmetics is one of the best under-eye concealers that not only conceals, but also hydrates the skin to up to 6 hours.  It is a stick concealer with the outer portion serves as the "hydrating stick".

I love it because it doesn't cake or crease around my eyes even if I forgot to put on some eye cream.

It goes on invisible and doesn't require heavy blending for it to go incognito on your skin.  The middle part of this product is the concealer itself, which you can also dab on pimples and spots that are still peeking through your primer/foundation.

How to use it:
Glide the concealer under your eyes and gently dab outward to blend using your ring finger.

3: Cream Blush

Rimmel Stay Blushed! liquic cheek tint is actually a cream blush that blends easily and seamlessly to create a natural-looking flush of the cheeks rather than actual blush.  It is lightweight and lasts for hours.

How to apply:
Lightly dab a pea sized amount on both apples of your cheeks and blend.

4. Mascara
The Bobbi Brown Smokey Eye Mascara has been one of my favorite mascara brands out in the market.  It makes your lashes look full, and a little bit longer without much clumping and smudging.  It is just amazing!

How to apply:
Dip the lash wand in the mascara two to 4 times to evenly coat the brush with the mascara since mascara is a thick sort of color. Now while applying the mascara on the upper lashes go from the root to the tip of the lash hairs and never backwards. Moving the brush in a zig zag manner from one side to the other and with the last stroke ending towards the outside of the eye i.e the otherside of the nose or the side nearest to the ear. For the lower lashes you may follow the same rule or you may give 4 to 5 strokes of the brush in one direction just by swiping it through the lashes from the side nearest to the nose to the side outwards. take a Lash comb and comb the eyelashes to avoid any clumps whatsoever.

5. A Moisturizing Lipstick
I am so in love with Nyx's Butter Lipsticks lately!  Seriously girls, this stuff really glides on like butter that you don't need to put on lipbalm unless your lips are serverely chapped.

My favorite shade for an everyday look is this one called "Sweet Tart", a deep pink with a blue undertone.

They also have a shade called "Razzle" which is a purple-pink pop of color that is almost fuschia in color that is also great for a spring or summer look.

How to apply:
Apply the lipstick starting from the center of your lips, and slowly working it outward.  Blot.  Then reapply for a longer lasting tint.

And then you're all done!  This 5 step routine is very easy and can be done in 3 minutes or less.

Later in the day when you feel like you need to re-do your makeup, just use a blotting tissue and/or apply a thin layer of face powder to get rid of the grease on your face.

I hope you ladies likie my post.  If you did, please LIKE my Facebook page: https://www.facebook.com/BeautyCallByMonica

And also do message me for any questions or suggestions on what you'd like to see in my next posts.

Stay gorgeous my loves!

xx
M


Wednesday, May 6, 2015

Review | Too Faced Chocolate Bar Palette

A review on my favorite palette, the Chocolate Bar by Too Faced!


I got my Too Faced Chocolate Bar palette for $49 from Sephora.com and my cousin from Los Angeles just brought it home with her.

This palette has created a massive hype in the US, so I had to try it for myself.

What I love:

1. It smells like chocolate.  Apparently, the base ingredient for these shadows is cocoa powder which I know has some anti- aging benefits.

2. The palette comes with 16 shades / colors and gives you an extensive variety for eye looks.  6 of the shades are matte and the rest are shimmery.

3. The eyeshadows are super pigmented, and it is very creamy for a powder shadow.

4. Though it is a powder shadow, I get very minimal or no fallout.

5. The color names are cute and they actually make me hungry most of the time.  The shades are named after different types of chocolate or ingredients that is mixed together when you make truffles.

6. The highlight color (on the lower right), is so beautiful and I'm glad they made it bigger and I get more of it.  I can use it to highlight my cheeks and the bridge of my nose too.
7. For a neutral palette, there are other colors that make it very diverse to get a wide range of eye looks with a neutral base and a pop of color.

What I don't like so much:
1. The packaging is made of tin, and when you close it, it closes lightly with a magnet that isn't very strong so I'm always afraid if I closed it right or not.

2. The mirror could be bigger.

3. It didn't come with a nice eyeshadow brush like the Urban Decay Naked palettes.

4. The insert where they wrote the names of the colors is a cheap acetate one that everybody is bound to lose.  And it is a hassle everytime I open it, I have to put it somewhere I won't forget or lose.  They should have just written down the names below the pans just like the Naked palettes.


Color Description

1. Gilded Ganache - Greenish brown with tiny gold sparkles
2. Salted Caramel - Camel tone light brown that is almost peachy
3. Hazelnut - Metallic taupe
4. White Chocolate - Matte cream color that acts as a good base
5. Marzipan - Salmon pink shimmer
6. Creme Brulee - Metallic gold shimmer
7. Semi Sweet - Matte dark brown
8. Haute Chocolate - A little bit similar to Hazelnut, but is darker
9. Milk Chocolate - Is a matte tan brown that is very similar to the Chocolate Soleil bronzer by Too Faced
10. Strawberry Bon Bon - Matte light pink shade 
11. Cherry Cordial - Wine red brown with a little shimmer
12. Black Forest Truffle - Dark grey brown shimmer
13. Candied Violet - Purple shimmer with a hint of pink sparkles
14. Triple Fudge - Dark brown shimmer that is almost black
15. Amaretto - Dark coffee brown shimmer
16. Champagne Truffle - Highlight color with a hint of light pink


The Look I created:


How I did it:

1. Cover entire lid with White Chocolate up until the brow bone
2. Use Salted Caramale as a base on the outer V
3. Use Creme Brulee or Marzipan on the main lid
4. Use Cherry Cordial as a transition shade on the outer V
5. Smudge a little Semi Sweet on the waterline
6. Use Champagne Truffle as a highlight color for the inner corners of the eyes
7. Use a liquid liner of your choice to create a winged eye look
8. Top it off with mascara and false eyelashes

Hope you guys like this post!

xx
M

Tuesday, May 5, 2015

Event | Bobbi Brown Makeup Lessons Philippines

Last April 9, 2015 I was invited by Bobbi Brown Philippines and Fujifilm Philippines to their event in promoting Bobbi Brown makeup lessons and a few makeup lessons from Bobbi Brown's Regional Artistry Manager, Felix Nguyen.


To my surprise, I found out that my very good friend, the ever so gorgeous Ms. Pat Natividad was the host of the event.  (I am so proud of you Patring!)


I also got a chance to chat and get a photo op with Felix Nguyen himself who told me that "Makeup should be fun, and it shouldn't change the way that you look but just to enhance the best features of each person."  I absolutely agree.


During the event, there were makeup stations located at every corner of the venue where you can get your makeup done by Bobbi Brown's trained artists and you can even get consultation on skincare regimens and products.

I have always been a huge fan of Bobbi Brown products because they are so lightweight, they last, and you actually get a good money's worth for each Bobbi Brown product that you buy.

After the event, I am one of the lucky few that got to take home a Bobbi Brown gift bag.


The gift bag contained the following Bobbi Brown products:
a small Bobbi Brown makeup pouch
1 Bobbi Brown Smokey Eye Mascara
1 Bottle Bobbi Brown Makeup Remover
1 Bobbi Brown Eye Cream
1 Bobbi Brown Creamy Matte Lip Colour in Rouge
1 Bobbi Brown Long - Wear Eye Pencil in Jet Black
and of course, a booklet with Bobbi Brown's Ultimate Makeup Lesson


To be honest, I have never tried any of the products in the gift bag except for the eye cream.  I have always purchased Bobbi Brown's Cleansing Oil, and I tried Bobbi Brown eyeshadows before which I did not like at all because I would get massive fall outs and its just not as pigmented as other eyeshadows usually are.

But this time, I fell for their products once again.  The Bobbi Brown Creamy Matte Lip Colour in Rouge is just absolutely gorgeous and it is now on my top 5 favorite lip colors.

The Bobbi Brown Long - Wear Eye Pencil is just absolutely divine and has earned a "Holy Grail Status" in my book.  I now can not do my makeup without it.  It is very pigmented, super smooth and creamy, goes on like silk, but smudges just a tiny bit to give you the right amount of smokey look in your eyes.  I also love that it is safe to use on your tightine, and it just lasts all day.  The only thing I hate about this product is that it is so hard to take off, but I don't care because the look I get from using this is just perfect.  Too bad that I only got a tiny sample from the gift bag because now it means I need to get the actual product from the store.  But seriously girls, this is the best eye liner pencil I have ever tried.

So moving on to Bobbi Brown's Ultimate Makeup Lesson, you can all watch it here:
Bobbi Brown's 10 Step Makeup Lesson

I'd like to thank Ina from Bobbi Brown PH and Maan of Fujifilm PH for inviting me to the event!  Stay pretty as always and congratulations for such a successful event!

xx
M


Review | Real Techniques Brushes

So when my cousin from Los Angeles came home to the Philippines last month, I finally got my hands on my very first Real Techniques brushes that I ordered from their website : https://realtechniques.com/ 

A very big thanks for bringing them home to me Ate Djho!


There were times that I was a bit hesitant to purchase them here because I was really afraid to get fake ones (not that I have anything against buying fake or imitation products), but if I was going to pay around $20 or around 1,000 pesos for a set of brushes, I might as well get the real deal from the company itself.

So basically the story behind the success and hype of these brushes started with the two gorgeous and brilliant sisters, Samantha and Nicola Chapman, two well known makeup artist and experts from London who used their passion and talents into developing the amazing tools most women and makeup artists are looking for.  And I must say, they do know what we want.

I am amazed by how these brushes fit exactly how I want the product to go on my face, and to be honest, the brushes are actually very versatile as well.

Here are some examples:

1. The Blush Brush


The Real Techniques Blush Brush is rather big and fluffy, so it can also serve as a fluffy powder brush.  And even if you have a smaller face, if you angle this brush on just where you want the blush to go, you will never get too much.  It's genius.

2. The Setting Brush


The setting brush is shaped in a way that it is easier for you to put on setting powder underneath your eyes, and it can also double as a brush used for your highlighter or bronzer for contouring.

3. The Expert Face Brush


The Expert Face Brush is actually one of my favorites.  It is so versatile, I can use it with liquid foundation or cream foundation.  It can serve as a buffing brush, or even a stippling brush for foundation, concealer, or even blush.  I also found it very useful when doing deep contouring with bronzer.

4. The Buffing Brush


The Real Techniques Buffing Brush is also very versatile just like the Expert Face Brush.  Since I already use the Real Techniques Foundation Brush and Stippling Brush for my foundation, I use this Buffing Brush to highlight my cheeks, the bridge of my nose, or sometimes to set powder on my face.  Since this brush is a lot smaller than my big fluffy powder brush, I usually take this with me instead when I am out or on a trip to do my touch - ups.

5. The Shading Brush

Now this brush is an absolute must.  Because I have found this to be very useful in applying my eyeshadow, I have decided to also purchase the Real Techniques Starter Set.  This shading brush can apply cream or powder eyeshadow, and can also make blending in the outer crease a breeze even for my almond shaped eyes.


And though I did not get a photo of me using it, my absolute holy grail brush is the Real Techniques Foundation Brush.  Seriously, this is the best foundation brush I have ever used. Ever.  It applies the foundation really well, spreads it evenly at half time, and it doesn't leave those lines behind that you usually get from other foundation brushes.  The brush is simply amazing.

So, to conclude my review, though I still use my Mac, Bobbi Brown, and Eco Tools brushes, I will definitely go for Real Techniques any time.

Real techniques brushes are inexpensive, really great quality, easy to clean, doesn't deform even after numerous washing, lightweight, and I just love that most of the brushes can stand alone.

Here in the Philippines, I saw that The Ramp in Glorietta Makati has been selling them at prices fairly near to the ones on the website of Real Techniques.  I have also spotted numerous online sellers on Instagram selling these products, so if you are interested, do send me a message and I can refer you to them.

I hope you beauties find my review helpful, and if you did, please do subscribe to my blog or share this entry on Facebook.

Thank you and have an awesome day!

Stay gorgeous!

xx
M

Monday, May 4, 2015

Makeup 101 : Makeup Kit Essentials

Hi Sexies!

So let's talk about the basics : What are the essential products you should have in your makeup bag or your kikay kit.

I have listed a few items below that I personally cannot leave my house without.  And if ever that I am in a rush or if I have time to do my makeup in the car (as a passenger of course), or if I have time to do it when I get to work, these are the items I take with me to make sure I will look presentable, professional, and just put together.  The photos below have different products that I use, of course I do not bring them all with me, I just choose one of each.

So let's get pretty!


Step 1: Primer

"It's a crime not to prime"
So the purpose of using a primer is so that you will have a smooth face/canvass to work with.
This also helps your makeup last longer and stay vibrant after a couple of hours.
My favorite is actually The Porefessional from Benefit Cosmetics (however I just used up my last tube). It is a bit pricey so I often use Maybelline's Baby Skin Pore Eraser. This is only around P299 at Watson's and it works amazing. A tiny pea-sized amount goes a long way with this product and I discovered that it helps control sebum a little bit as well.
For those days that I would like to get an illuminating glow to my makeup, I use a CC Cream from Etude House to achieve that dewy glow effect.
For a matte primer, I use Babyface One Step Base from It's Skin Korea in Lavender pink to help correct the discolorations on my face.


Step 2: Foundation / BB Cream


I believe because of my Chinese heritage, my skin responds a lot well to Korean and Japanese foundations. I have tried a wide variety of foundations, even spending a lot on high end ones, but I find that these ones work for me better.
I use a Beauty Blender to apply my foundation or the BB Cream to achieve that flawless finish. Sometimes I also use a foundation brush to get a more matte and a heavier coverage. So far my favorite is the new Stay-Up Foundation from Etude, it is a perfect match for my skin, it is light, and the coverage is amazing. The Aqua Petit Jelly BB Cream from Holika Holika is also great, however it does tend to fade away after 6 hours max. I also love this BB Cushion from Etude House, it is easy to apply and gives me that dewy effect. The coverage though is a bit light.


Step 3: Concealer


Though having almond shaped eyes, I still get panda eyes (yes dark circles around my eyes) so I use the Maybelline Age Rewind concealer for under my eyes and on the bridge of my nose to help highlight. I use Nature Republic's Botanical Vanilla Stick Concealer for my breakouts and dark spots. It is so inexpensive (P245) and the pigmentation is really great. I also use the Face Pot Concealer from Tony Moly for those days where I know I would need the heavier type of coverage. I blend in my concealer using either a concealer brush or my Beauty Blender.


Step 4: Brows


I am not an expert on brows, and this is actually my weakness.
That is why I use a brow pencil from Etude House or The Face Shop because this is the easiest to use to temporarily repair sparse brows and shape the brows effectively. It comes with a spoolie brush on the other end as well so it is a 2-in-1 product. I also use brow powder sometimes, but not as often as a pencil. You can also substitute a regular eyeshadow that matches your eyebrow shade, or a shade lighter than your natural hair to achieve a younger look.
Instead of using a brow gel, I use this "Color My Brows" from Etude House which works as well as a brow gel, but with color.


Step 5 : Eyeshadow Primer (Optional)


This product helps with your eyelids from creasing, and it makes eyeshadow apply on smoothly on your lids. It also makes your eyeshadow stay on longer and it helps make the colors a little bit more vibrant and pigmented once applied.
I have been loving the Poof 10 Eye Shadow Primer from Etude House a lot better than Urban Decay's Primer Potion which is a lot more expensive. The Cover Girl Eye Shadow Blast is actually an Eye Shadow and Eye Primer in one just like the 2 gold ones I have here from Urban Decay.


Step 6: Eyeshadow

If you are rather new to makeup, your best bet is to start with a nude palette.
I love this Dream Catcher palette from NYX, it is an almost dupe of the Naked Palette from Urban Decay. (My Naked Palette and Too Faced Chocolate Bar palette is still arriving from the US next week and will be writing a review and tutorial on them soon, so stay tuned).
I also like Too Faced Boudoir Eyes and Natural Eyes (Not shown) because they come with these little booklets that serve as a guide for different looks you can do with the palette.
What I really didn't like was this Naked palette by City Color. It is not pigmented at all, and I have to use a lot of product to actually see it on my skin.


Step 7 : Powder / Setting Powder (Optional)


And because we live in this very humid tropical country, I can not go out without setting my makeup with a hefty amount of translucent powder to seal all my hard work in place.
I am really loving L'Oreal's Infallible powder, though it is not translucent, it does last for about 10 hours. The best translucent powders I have tried is the Healthy Wear Powder from Physician's Formula and the popular Ben Nye Banana Powder which is also great for highlighting.


Step 8 : Bronzer (Optional)


I have a big face. Very round, and my cheeks are rather perky most of the time so I can not leave my house without contouring my face. I also find it best when I go for deep contouring to give that illusion that I have a gorgeous bone structure (even though I don't) haha :)

Step 9 : Blush

You should only have 2 colors for your blush collection, and thats about it.
1st is a soft pink, and 2nd is a peach/orange colored blush with a little shimmer, and you are all set.
The pink can go with any makeup or outfit, while the peach one is perfect for a summer glow. I sometimes use the Stay Blushed! by Rimmel as a cream blush base, then set it with a powder blush when I have to be somewhere for a couple of hours. I find that this helps a lot in making my blush last longer.


Step 10 : Eyeliner and/or Mascara
I find it best to apply eyeliner and mascara a little while after my eyeshadow has settled down a bit.
Being a 'chinita' I use my mascara like a beast. I have very sparse and short eyelashes, so I need a lot of mascara to help open up my little eyes, and give me an overall bright effect. I also use my eyeliner to do my winged eye that helps make my eyes appear bigger and a little more elongated at the ends.


Step 11 : Lipstick, Lipbalm, and Lip Gloss
There are some lipsticks that don't apply well after you've just applied lipbalm, so I find it best to put on my lipstick first before slathering my lips with a balm.

Step 12 : Setting Spray or Setting Powder (Optional)

Once everything is complete, i decide to go on with one more sweep of a setting powder and I finish everything off with a setting spray that will help set my makeup quicker, give me a dewy finish, and helps my makeup stay in place longer.


Why Beauty Call? This is my story.

I am Monica.

I LOVE MAKE-UP! ♥ I didn't use to... but now I do. Very much.  It was a long term engagement between makeup and I, but I finally gave in because it was for the best.  So I said "Yes", "I do" and "I will" to makeup and now we are raising a beautiful skin and gorgeous future together. hahaha

I am Chinese - Filipino, but born and raised in Manila, Philippines.


I am a wife to a handsome, kind, and creative man who made my dreams of having a blog come true LOL (he helped design and set up my blog), and I am a mommy to an incredibly adorable and brilliant 3 year old boy.


During the day, I work as the head of sales & marketing of an international digital advertising company. But on my own free time, I am a make-up addict, beauty-junkie, cosmetic hoarder, and just your average, everyday, woman who strives to be beautiful and larger than life... starting with how I look.


I decided to make this page and start the blog because I wanted to be an inspiration and also to be inspired by YOU! The women who are just like me who are too busy with work, family, and other factors that make us (well, let's be honest) look like we haven't exerted any effort to even brush our hair, conceal those darn bags under our eyes or have our eyebrows waxed (you know what I mean).


Ladies, let's be 100% honest. It is actually easy to be pretty...but it is hard to actually stay pretty. It is just too much effort (am I right?!). And sometimes we just can't find the time to be bothered to actually go full blast - bombshell gorgeous all the time.


When we buy beauty products, its because we either just gotten used to them for a while, or they have a kick-ass advertisement, or it was recommended to you by someone. And there are times where, it actually doesn't work as well for us as it did with the other person.

I will be writing about what I love in the world of beauty...which is make-up and skincare. I will give you unbiased reviews that I myself would want to hear from others about a product.


So I am here to actually share my journey to achieving and staying beautiful, presentable, and real.


A close friend of mine once called me "Lola" or "Grandma" when I was in that steep slope of just letting myself go (appearance wise).

And that really got to me.

I then had a calling, to get up, and fix myself and how I looked. I realized that how I look actually matters, especially with my job which is facing clients everyday.
I started believing that despite being a mom to a very active toddler (no nanny - just daycare) and a full-time employee managing a team, I can still look great.


When I realized all these, I immediately got up in the middle of the night, and fixed my vanity desk. I put out all my make-up, and other products to 'beautify' myself and I created this tiny area in my room just for me to sit and do my skincare routine and makeup.

It was a BEAUTY CALL.